Background

Wednesday, October 31, 2012

Champions

I had mentioned before that my daughter Katie was finishing up her fall softball season.  Last night was the team party and what a good time had by all.  The typeset on this frame was created using Word and text boxes as I recently discussed in several blog posts.  After printing, I used the Cricut to cut a square frame out of the cream cardstock to make the picture frame.   I used Distress Ink to alter the frame and soften around the edges.  The girls obliged by signing the frame making it unique and special. Each of the four coaches received their own picture.  This has been a running gift for the 12 or more seasons that Katie has been in softball.  Dan's pictures are hung on Katie's bedroom walls along with her medals earned.  It makes for a nice decoration and good memories.

I once again created picture books for each of the girls.  The photo albums contain pictures taken during the games and are a smattering of individual shots along with group photos.  This year the team was fortunate to work hard and pull together to win the end of season tournament.  In a hard fought battle, the Angry Birds overtook the AZ Heat in a 5-4 nail biter.  The win took at least one good play from each of the girls and definitely spoke to the coaches and girls about the importance of team play. 


 There is a considerable amount of work involved if you consider that I have to take 10-12 pictures to get one good action shot.  Besides the sorting of the pictures, I also create the front and back covers that are inserted in each book.  However, the fun of looking through these memories and the joy at capturing that picture that *looks* just like each girl more than pays for any effort expended.  The album is also a tradition, so Katie has a whole box full of albums to go along with her wonderful memories.  My hope is that in the years to come these girls will cherish and enjoy the albums as much as I had fun and joy at making them.

Congratulations to the Tempe Ladyhawks 14U Fastpitch softball tournament champions!

Andie

Tuesday, October 30, 2012

80th Birthday Celebration


My MIL asked me to put together a save the date/invitation for my FIL's 80th birthday celebration.  What an honor!  I have been so inspired by Stephanie who blogs over at Burlap Kisses that I just knew that I wanted to incorporate burlap into the final product.  This is my final result.


The stripped patterned paper comes from open stock at my HL. I hand-folded the strip of brown cardstock after scoring the paper using my Score-Pal.  Brandy (brilliantly!) pointed out that I should have scored the 8 1/2 x 11 brown cardstock and then cut strips to 1 in.  That's why she's the best friend, ladies and gentlemen!  Needless to say, I only made about 20 of these cards and mailed them out a few weeks ago.  The sentiment was printed onto non-textured white cardstock using my computer.  I used the Word trick of placing text boxes with the images/sentiment inside. 


I use Office 2010.  The "lovely" Drawing Tools ribbon (in orange above) and the Picture Tools ribbon both provide the commands to manipulate the text boxes.  I'm a fan of moving them around on the page and printing a test version until everything is in the right place.  You can click and drag to highlight certain words and change the font or size to mimic any scraplifted image.  If you don't have a large variety of fonts on your computer, stop by Creating Keepsakes each Friday and download their free font over at Free Font Friday.  It may take a few weeks to increase your selection, but most word processing software come with a variety of fonts that can create a close approximation.


I use the same method to create this menu selection and instructions for RSVP that was adhered to the back of the Save the Date card.  My MIL, Pat, decided that since almost every single attendee was family who was already aware of the event she wanted to combine the save the date with the invitation and save a little postage.  The border came straight out of Word's Clip Art-another source of images that are free!

I found this YouTube video that explains text boxes using Word 2007.  I believe much of the instruction is similar and works for 2010.  The key here is to play around and make things work.  I find it easier to make several small text boxes that I can size and place with my mouse rather than one big text box with lots of different formatting.  Give it a try. It is a cost effective alternative to purchasing lots of stamped sentiments and gives you the flexibility to make your own invitations with instructions for your guests.

I've used this technique a couple times before.  You can see some examples:

Using clipart and words on a autumn card

Making place cards using Word and Fill the Page cuts with the Cricut

Using watermarked images to make a background

Using the text box color to make an image


I've entered this card in Our Daily Bread Designs (ODBDS) challenge- Make a card or project for the men.
 
Andie

Friday, October 26, 2012

Birthday Girl

This is another of Brandy's creations.  This birthday card was made for her sweet niece, Izzy.  I may not have everything right, but I believe the Birthday Girl is cut from Cricut's Storybook cart and the presents come from Cricut's Christmas Cheer cart.  Brandy has a Gypsy that she uses with her Expression.  This makes stringing the presents into a border a simple click and drag process.  I know because she's said as much that her Gypsy is one of her favorite parts of using her Cricut.  We're both really hoping that ProvoCraft doesn't make a huge mistake and obsolete this wonderful product.  At the least, we will hope they continue to support and resolve the many problems with the Gypsy. 

Don't you just love those epoxy balloons?  They came from a prepackaged set.  I think Izzy thought this was a happy celebration for her seventh birthday.  What a good job, don't you think?

Brandy (through Andie)

Wednesday, October 24, 2012

Grrl Power

I found this picture of a page Brandy and I worked on together.  This is old- probably dating back to the start of the blog two years ago.  We haven't been the most prolific of blogs, but it has been fun to share.  This particular page was designed and entered into an online challenge.  I've long since forgotten which challenge or what blog, but it was centered around Breast Cancer Awareness month (that is October!) and the theme was Grrl Power.  I thought I would share since that time of year has once again returned and it is never often enough to encourage the younger generation to develop their own sense of girl power.  My daughter Katie continues to develop her pitching skills and will wrap up her season this week.  That means more softball crafts to do and in a hurry!

I say, go Katie go.  I say, fight Angry Birds fight.  I say, win Angry Birds win.

Andie

Monday, October 22, 2012

Not My Christmas Card


This is not my Christmas card.  It's close, but not quite the final design.  I thought I would share with you since I just love how the Graphic 45 papers went together on this one.  The sentiment is stamped using Vintage Photo Distress Ink and Close to My Heart's Christmas Card Chatter stamp.  I actually got my daughter's sewing machine out and pieced that strip down the center of the card.  I just love the Graphic 45 papers and am pleased that this near rendition of my Christmas card came together so easily.

Andie

Friday, October 19, 2012

Scrapbooking with your Grandma


My son and daughter recently joined me on a Fall break trip to Colorado to visit my Grandma and Grandpa. It is such a blessing to be an adult grandchild spending time with your kids and grandparents. I remember the not-often visits with my own great-grandparents. My prayer is that they will continue with us for years so that my children might have an adult relationship with their own great-grandparents. 


We traveled from their home in Broomfield, Colorado to Estes Park and down to Colorado Springs. The depth of color and range of beauty is breathtaking. We saw snow up on Trail Ridge Road (they have already had their first storm of the winter season).  The days were usually sunny and bright.


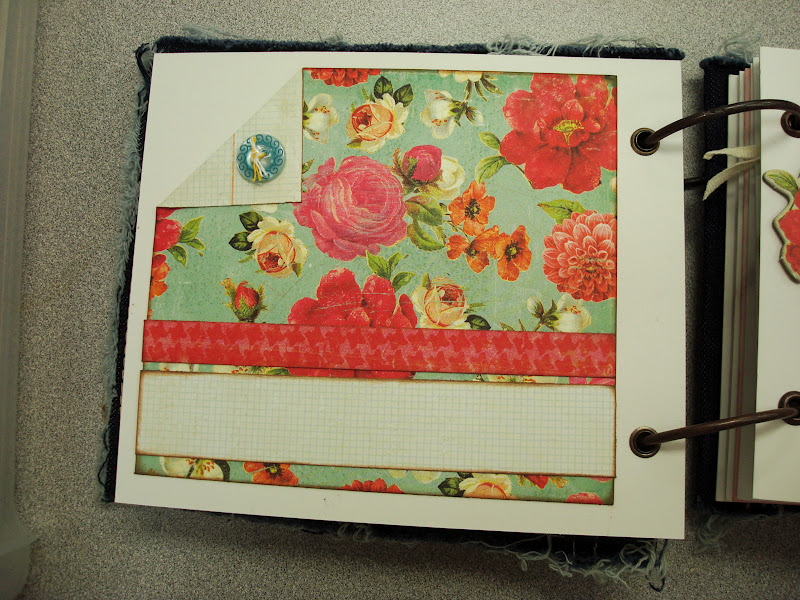
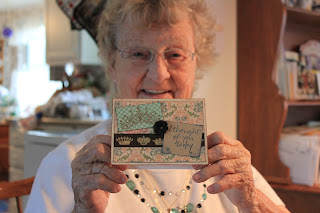
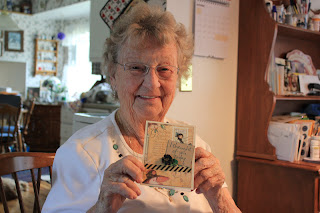
However, truthfully speaking spending time with my grandparents was the real highlight of the trip.  I was even able to squeeze in some crafting time with my Grandma.  She saw a pretty crown stamp that she will likely use on card envelopes (her arthritis makes crafting alone difficult).  So, I picked out some Graphic 45 paper and bought a card set so that I could make these cards with her.  Grandma makes suggestions and I make the cards.


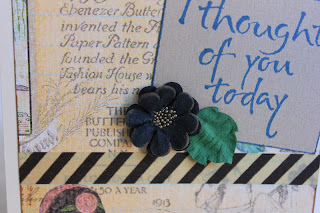
The craft tape (brown crowns) comes from a Recollection tape set I picked up and gifted to my grandma.  She can use it to artfully close letters she sends to folks.  She still regularly send letters in the mail.  We always get a card for the minor holidays like St. Patrick's Day and Valentine's Day (postmarked from Loveland, Colorado!).


I picked up the sentiment stamp in a small store in Estes Park called 
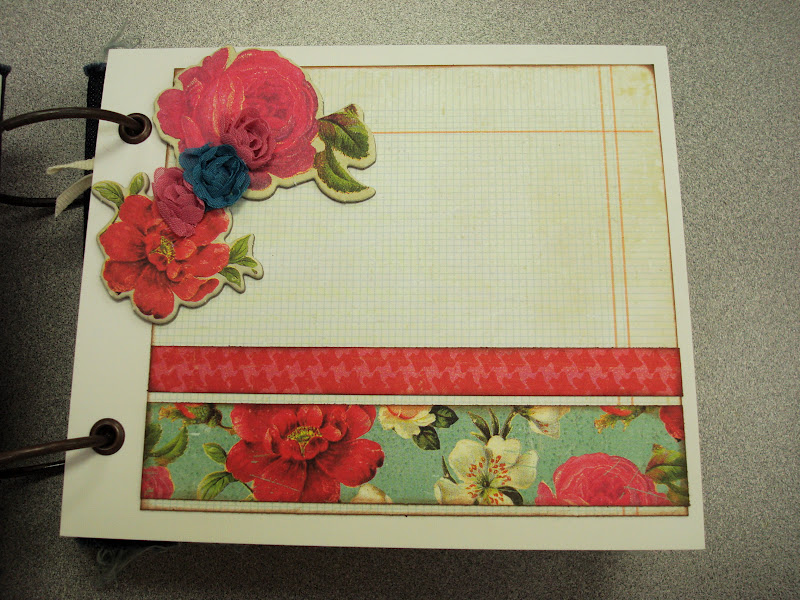
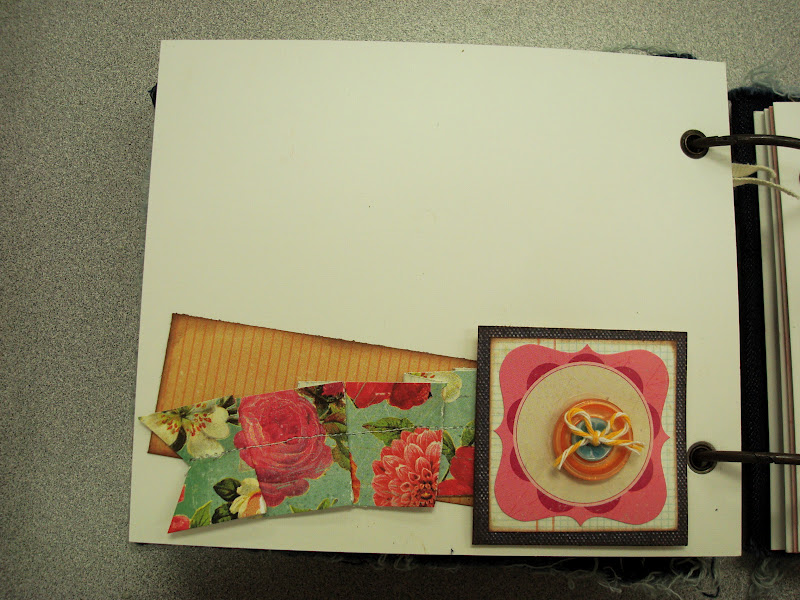
Rocky Mountain Memories and Paper Arts Studio.  They specialize in beautiful paper with photo quality landscapes of the Rocky Mountains.  A whole rack is lined up at the door.  They also sell a good deal of Ranger and Graphic 45 product, just up my alley.  We made 4 of this variation in design and then made a smattering of other cards from various scraps. 


Grandma would model each after they were finished.  I can tell you that this quiet time was incredibly precious to me and better than a thousand hours spent crafting alone. 


The cards even embody a little of grandma's style- very old fashioned and soft colors. 


 Can you tell, I love my grandma very much?!?


I say grab a scrap buddy and make something paper this weekend.  I intend to spend all day tomorrow with my bff Brandy at Embellish It's Play All Day.  There's still room to join us.  It promises to be good. 

Looking forward to many more craft days with my grandma (and a future post on some crocheting that was done on the same trip)-

Andie

Wednesday, October 17, 2012

Decorated Tin Container

Tim Holtz is one of our most favorite paper craft rock stars.  Brandy and I were even were able to meet him in person a little over a year ago.  It is no wonder then that we have used many of his techniques featuring the work here on our tiny little blog.  Specifically to this post, we've both made many of his paper roses.  You can find a good YouTube video demonstration of the technique here.  The technique can be a little tricky at first, but the final result is stunning.  Much like riding a bike, once you've figured it out you'll never forget.  I've used a flower made from double sided patterned paper to accent this small tin gift box.  The tag was cut from Cricut's Accent Essentials cart and stamped with a CTMH stamp set.  This cute little tin was used to gift a small amount of fudge to a friend.  I had premade the flower, so it was a couple minutes to cut out, stamp and ink the tag, find the finished flower and swirl embellishment from previous crafting excursions, a little glue and we've got a quick gift of fudge.

Thanks so much for looking.

Andie 

Sunday, October 14, 2012

Embellish It- Crate Paper Random Collection Mini-album

Brandy is a wise and thoughtful shopper.  She has such a great eye for the best of paper crafts in general and the best in mini-album design specifically.  When we attended last year's Play All Day event in Mesa, AZ hosted by Embellish It, she wisely picked up this mini-book kit.  Yes, being a *more than* full time working woman, it does take a little while to get around to making the album.  Since she completed this album a few of weeks ago, I snagged these pictures of the album to share her stunning work with all of you.


This Happy Times kit is no longer available through Embellish It.  However, the design can sure be used for skillful inspiration.


Rosettes- Totally trendy!


Buttons- An oldy, but a goody!


How about some fabric roses?


Butterflies are one of Brandy's favorites!


A couple of the pages were beginning to be completed as I photographed this work of art.


The back page was simply a denim (actual fabric denium) covered chipboard.  Don't you find this lovely?  If you've never checked out the stuff over at Embellish It!, I recommend you skip on over and see what they've currently inventoried. 


They usually have a lot of the trendy, smart looking product out in the market place.  Brandy and I will be attending one of their Play All Day events here in Mesa shortly.  They usually sell out for these events, so sign up early.  Shelby always has a lot of fun product to sell and great make-n-takes during the crop time.  I know we are both looking forward to it!

Andie (for Brandy)


Wednesday, October 10, 2012

Monochromatic Card Set


I picked up a new stamp a while ago.  This  sentiment was just so pretty I knew I had to create some cards with in.  I picked some monochromatic cream and white patterned paper out of the stash to see what I could create.  The result is a set of four cards (half of which are pictured here).  I was able to find four matching pieces- two from each pattern.

The pictures do not actually do the cards justice imho.  I've highlighted some of the shading in the card with a glitter pen.  The edges glisten in person.  The sentiment is stamped in coffee Archival Ink.  I used water to create the crinkle effect in the vintage seam binding finally tying a bow and adhering with a glue dot.  The stick pins were just hanging around the house, so I thought originally that they might look like the stamen of the flowers.  Not sure that worked like I expected, but I'm pleased with the result.

Not bad and I can say I actually used my new stamp and some of the paper stash.  Yeah me!

Andie

Sunday, October 7, 2012

Butterfly Kisses Card


Sorry for the over exposed image.  Occasionally, the only pictures I can grab from Brandy's wonderful work are cell phone images text to me late at night when the lighting isn't the greatest.  I am sure the email went something like this. . . What do you think?  Well, I think Brandy's work is always fabulous.  Maybe she should seek a truly independent opinion.  Or, more likely, I am right. 

Here is a beautiful butterfly kisses card created earlier this year.  I found the image in my phone and felt I should post it.  Brandy used the tri-fold card design and all of her butterfly and dragonfly accessories.  The color scheme is lost in the poor image, but was beautiful in person. 

Thanks for looking.

Andie (for Brandy)

Friday, October 5, 2012

Christmas Gift Ideas


Just a quick post.  Not a great picture, but I ran across this picture of the gift I made for my co-workers last year.  It is not a fancy gift, but a good example of blending my frugal (cheap?) craftiness.  My daughter, Katie, is a Girl Scout and sells fall products to support troop activities.  Last year they sold some yummy butter toffee peanuts.  I purchased 12 containers and altered the look to celebrate Christmas.  The original container is colored by the Girl Scouts, lots of primary colors with green and yellow being predominant.  The lid was actually a bright yellow.  This proved my biggest challenge as paper didn't want to wrap around the lid and look nice.  Tissue tape to my rescue.  I tore pieces of tissue tape and adhered it randomly to the outer rim.  Since the yellow still came through the slightly transparent tissue tape and the tape takes ink well, I used a chalk ink to alter the tape and cover the lid color completely.  The tape wanted to separate from the lid (the flexibility of the plastic lid was not friendly).  Easy enough, I cut the circle with my Cricut and the snowflakes using Cricut's Winter Lace cart.  These pieces were glued in place with a hot glue gun (do you see the spot of glue on the leading edge of the snowflake right in the middle?).  Finally, the "button" front was made by edging a rectangular piece of red cardstock with a snowflake edge punch.  The brads were placed and a piece of crochet thread laced up the buttons.  All that and a large sale for the Girl Scouts (Katie was top seller for her troop).  Christmas is approaching, so give it a try.

Andie

Tuesday, October 2, 2012

Beautiful Copic Marker Colored Digi Stamp


Brandy has been at it again, this time playing with her Copic markers.  This beautiful image is a digistamp which has been printed onto a piece of white specialty stamping paper.  The image on the right was the first, learning attempt and the image on the left is the final product.  Each image is finished with multiple Distress Ink layers applied in different colors using the Ink Blending Tool.  This image became the face of a beautiful notecard, but I didn't grab a snapshot before Brandy sent this off in the mail.  Don't you just love Brandy's work?

Brandy (by Andie)