Background

Wednesday, April 30, 2014

Another Mother's Day Card


I made another Mother's Day card with my Authentique Grace paper collection.  This paper just goes together all on its own.  Here's the details:

  • All papers are from the collection and they are all edged in Vintage Photo Distress Ink.  The pink patterned paper was embossed with a Darice embossing folder.
  • The swirls are cut from matching patterned paper using my Sizzix Decorative Swirls.
  • The flower is store bought and has long since been separated from it's package.  I also rubbed on some Vintage Photo Distress Ink to tie this in.
  • The crochet ribbon came from the stash.  
  • On the inside, I used a sentiment from the collection.
I'm all set, a card for my grandma and one for my mom.  I'm even a little ahead of the game.

I decided to enter this card into the Simon Says Stamp Monday Challenge: Not So Mellow Yellow.  Even though my yellow flower is a bit mellow, I think that it qualifies as yellow and wanted to join in the fun.  Come on over to see all the yellow-y inspiration.

Don't forget that I've posted a comment party for some blog candy.  Please click through the link, read about my great fortune that, in the end, I am hoping will result in a small fortunate event for you.  All you have to do is follow my blog and comment to win!

Monday, April 28, 2014

An Unexpected Windfall


I spent the better part of last week out of town on business.  We visited Washington D.C., but didn't have time to visit any of the landmarks or see the cherry blossoms which were in bloom.  We did spend a great deal of time on the freeways around the D.C. area.  I snapped this photo of a cherry tree as we whizzed by on the freeway!

Right before I left, I received a wonderful box from the folks over at Inspiration Emporium.  I first heard of their online store when I registered for Creative Chemistry 101 offered by Online Card Classes.  They have a great assortment of the Tim Holtz product line and are my go to store online for his stuff.  I do follow their blog as well, trying to join their monthly challenges when I can.

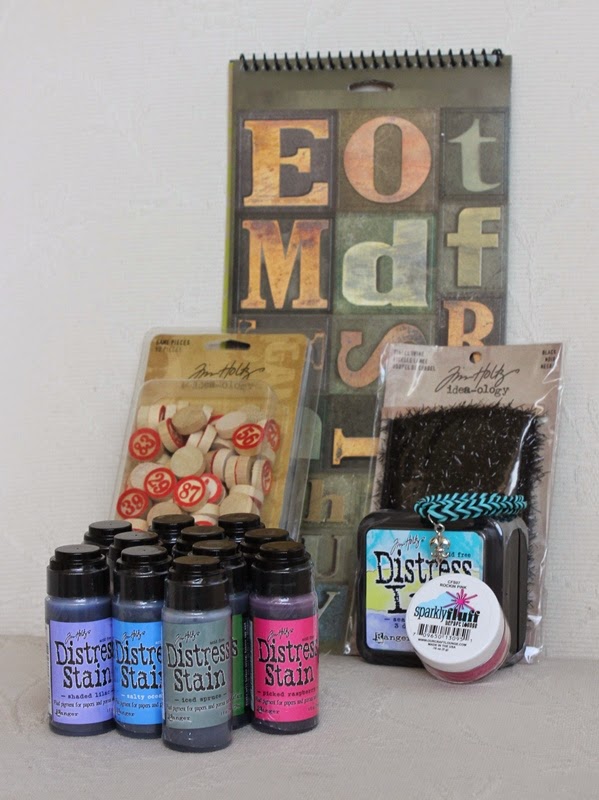
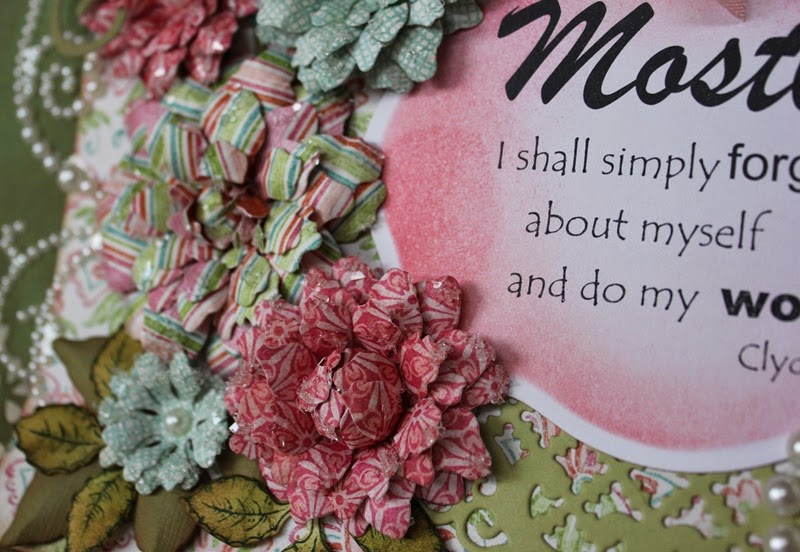
I had the great fortune to win their February monthly challenge.  Here's a picture of my winnings.  There's Game Pieces (wooden enumerated findings), black Tinsel Twine, Alphabet stickers, pink Sparkly Stuff, the spring colors set of Distress Inks and a overly generous amount of Distress Stains.


You might be wondering what this all has to do with you?  In fact, I find that I have a great deal of the Distress Stains in the stash.  I thought that my windfall should also be your gain.  I know that I don't get a large following in this blog, but if you happen to click through and start following my blog, I'm intended to give away two different sets of happy reward-

Reward #1- A set of seven Distress Stains

Reward #2- A set of Spring Seasonal Distress Ink pads and the matching Distress Stains
You have until midnight Arizona time on May 15, 2014 to enter.  I will chose from the comments/followers two random entries.  I will caution that the prize packages are only able to ship to US addresses.  Sorry- shipping prices have risen so high!  I thank you for the support.  I'll check back to announce the winners.

Check out the wonderful folks at Inspiration Emporium.  I can vouch for their customer service as well as their kind generosity.  Come join the fun in their monthly challenges, their April challenge, A Few of My Favorite Things, closes on the 30th.  


Saturday, April 26, 2014

A Praying for You Card


This card was totally inspired by a Pinterest pin. Thinking of a patterned paper with a large floral led me straight to my Stampin' Up Attic Boutique collection in the stash.  I picked out patterned paper to coordinate.

The most interesting part of making this card was making the shadow for the framed sentiment.  I used another pin with these instructions to get me there.I cut the frame out of white card stock three times, slicing the pieces apart as shown.


I used four pieces to glue to the back of the die cut out of yellow patterned paper.  This is a fantastic technique for making matting behind metal dies that aren't nesting.  I think it really makes the front of this card. 
On the inside, I layered some matching patterned paper from the collection and colored card stock creating a small space to write a heartfelt note.

I've linked this up with Word Art Wednesday's Challenge #129: Anything Goes.  Come on over to join the fun or just gawk at some amazing art.


Wednesday, April 23, 2014

Grateful


Yep, I finished up that MME Ooh La La for Her paper pad.  This card was made with all the same elements as the card earlier in the week.  The grateful die cut came in my care package from Loly.  The flowers were cut using my Heartfelt Creations Tattered Blossoms dies.  The center is a bit of Peacock Feathers Distress Glitter applied with a little Crystal Accents glue. The pearl accent was a sale purchase from Hobby Lobby.  I've added a few nice cards to the stash.  I should be more thankful and grateful for the graces and gifts given to me by family and friends.  I intend to put these cards to good use!


Sunday, April 20, 2014

He is Risen Indeed


Happy Easter!  Today is the day that we celebrate our risen Lord, Jesus Christ.  Today is the day we honor Him for His sacrifice on the cross where He did what I couldn't do for myself.  Now that is reason to celebrate.

I had seen this sentiment stamp in a craft magazine over a year ago.  I couldn't justify the purchase at the time (budget, shipping costs, etc.).  Almost a year later, a sale pretty much wiped out the shipping costs and I decided to take the plunge.  I almost couldn't wait to create a card for Easter with it.  Here's the detail on this card:

  • Patterned paper is Stampin' Up's Attic Boutique.  The paper doesn't have an ounce of glitter on it- that pattern simply creates a brightness that tricks the eye.  I found it perfect on this card.
  • The green cardstock was cut using my Heartfelt Creations Raindrops on Roses die.  
  • The flowers were first stamped with my Heartfelt Creations Sun Kissed Fleur stamps and then cut using the matching die.  I used a yellow Close to My Heart stamp pad.  I shaped the flowers, sometimes choosing to shape the center and other times using a pearl accent.  

  • I left the inside blank to hand write a sentiment on the inside before sending them out to family.  Ultimately, I made five of these cards.  I hope that you are celebrating with family and friends this day.  We will start our day at sunrise with friends in a intimate backyard celebration looking back at the dawning of that first Easter morning.  

    He was despised and rejected by men;
        a man of sorrows, and acquainted with grief;
    and as one from whom men hide their faces
        he was despised, and we esteemed him not.
    Surely he has borne our griefs
        and carried our sorrows;
    yet we esteemed him stricken,
        smitten by God, and afflicted.
    But he was pierced for our transgressions;
        he was crushed for our iniquities;
    upon him was the chastisement that brought us peace,
        and with his wounds we are healed.
                                                              Isaiah 53:3-5

    Praying the healing that can only come through the Son of God for all of you this Easter morning.


    Thursday, April 17, 2014

    So Very Thankful


    Another card created from the care package sent by Loly.  The thankful die cut was the perfect anchor for this card.  I wanted a strong color mix to highlight that die cut so I used my MME Ooh La La for Her paper pad.  The flowers were cut using my Heartfelt Creations Tattered Blossoms dies.  The center is a bit of Peacock Feathers Distress Glitter and plain white glitter from the stash each applied with a little Crystal Accents glue. The white glitter picked up a bit of color from that patterned paper and I really like the finish there.  The pearl accent was a sale purchase from Hobby Lobby.  


    A simple card with a nice result.  That paper pad is almost finished.  I'm going to keep it on the craft table to see if I can't finish it out. One less item in the stash!

    I'm linking up over at the Inspiration Journal's April Monthly challenge: A Few of My Favorite Things.  I simply adore my Heartfelt Creations flower dies.  Also, I'm linking up over at Word Art Wednesday's Challenge #128: Anything Goes.  Come join the fun or just stop by to look at all the amazing talent on display just waiting to inspire and/or encourage you.  


    Saturday, April 12, 2014

    A Bright Happy Birthday


    I mentioned in this post that a blog friend sent me a care package with goodies.  Not because I particularly needed care, but simply because she cared!  Loly kindly included some die cuts including Happy and Birthday that I could mix and match on cards.  This stunner was created using patterned paper from Stampin' Up's Attic Boutique bought on clearance earlier last year and sitting in the stash. The flower was cut using my Heartfelt Creations Tattered Blossoms dies.  The center is a bit of Peacock Feathers Distress Glitter applied with a little Crystal Accents glue.  Such a cute and simple card.  I think I might make more!


    Early Easter Craftiness


    Pinterest abounds with Easter celebration ideas and decorations.  Last year, I sewed for Easter.  That craft may maintain status as my favorite Easter craft.  Cute and full of chocolate goodness, they were a hit for my niece and nephews.  This year, though not quite the height of crafty achieved last year, I've decided on another craft to give a small gift at Easter.

    These eggs were made by pushing small chocolate, foil-wrapped Easter egg candies into water balloons. This can be the tricky part- the balloons are thin and so they tend to tear.  I typically pulled the lip of the un-inflated balloon around the candy.  When sufficiently surrounded by balloon, I then blow up the balloon to cause the egg to fall into the bottom.  I then repeat the process for the second chocolate egg only this time I tie off the balloon while inflated.

    The string/thread is crochet thread of various colors.  Yes, I also have a stash of crochet thread.  I simply dip the thread in Mod-Podge and, while wet, I wrap it around the balloon in a random pattern leaving the tie of the balloon on the outside.  When sufficient thread is wrapped, I use an binder clip to suspend the egg by the balloon tie on a piece of thread tied to the top of my laundry basket.  I let them hang there to dry.

    It can be tricky to determine whether your project is completely dry.  If it isn't completely dry, the thread egg will collapse and not retain it's shape. When in doubt, let it dry some more.  Once dry, I snip the balloon through the dried thread, trying to create a large enough hole in the balloon to ensure that the chocolate eggs fall out of the balloon.  The balloon can collapse around your chocolate egg making it hard to remove inside the egg.  You might need to move your scissors through several of the holes in the thread to do this successfully.  Once the balloon is fully separated from the thread, pull the balloon out through one of the larger holes.

    These treats are for my niece and nephews again this year.  I'm wondering how clever they will be in trying to remove their chocolate eggs.  We'll see next weekend!


    Monday, April 7, 2014

    A Sparkling Hello


    I had the great fortune to be blessed by one of my blog friends, Loly.  She blogs over at Card Ville.  She emailed me out of the blue one day and asked for my address.  Apparently she had somehow got her hands on duplicate set of Simon Says Stamp's Very Special clear stamps and wanted to share with me.  That is so generous and kind of her!  I promptly sent a thank you note off to her to let her know how touched I was with the gift.  Loly couldn't stop at sending me the stamp set all by itself, but instead included lots of fun goodies along with.  Isn't she grand!?


    • The flower was cut from MME's Ooh La La For Her paper pack using my Heartfelt Creations Tattered Blossoms dies.  I then shaped the flowers, layering the cuts and creating a glitter center with some Crystal Accents and Peacock Feathers Distress Glitter
    • The Hello die cut was part of the gift from Loly.  She provided a black, white and the patterned paper cuts.  I thought that the layering really added depth along with the linen background to add texture.  
    • The sequins were also a gift from Loly.  She's a peach and so this card basically made itself.  
    I continue to be amazed at how kind and generous blog friends are.  I'm an introvert at heart and so I make only a few close friends and stick by them with a fierce loyalty.  I'm not sure when Brandy and I started this blog over 3 1/2 years ago that I thought I would come to know, care for and be cared for by others as a part of the blogging world.  It really does make blogging a special treat and so I thank God today for Loly and her generosity as well as the other blog friends I have made.  Let's keep it going!

    I'm going to link this up with Simon Says Stamp's Monday Challenge: Journey.  It really has been an amazing journey this past 3 1/2 years.  This card is proof!  I'm also linking up over at the Inspiration Journal's April Monthly challenge: A Few of My Favorite Things.  Besides how much I love the Heartfelt Creations flower dies (one of my most favorite tools), the friends I've made blogging are definitely one of my favorite things!  Finally, I'm linking up over at Word Art Wednesday's Challenge #126: Anything Goes.  These opportunities to share my talents add to the feeling of community that blogging brings.  Come join the fun or just stop by to look at all the amazing talent on display just waiting to inspire and/or encourage you. 

    Friday, April 4, 2014

    An Encouraging Sign


    Work has been filled with stress lately- pressure to get things done, pressure because things aren't going right... all kinds of pressure.  I've been doing my best to ward of the inevitable lapse in creativity that often comes with this kind of pressure.  One way was to sit down (after making no time to craft at all this weekend) and make this sign for my desk.  The quote comes from a lecture given in 1976 by Clyde Kilby.  It's like he knew what kind of being I would become and decided to make me a list (I like lists!).  Of course, he didn't know me and wouldn't necessarily know what I'd become- just that we are all so similar.  There's comfort in that too.

    The quote was created using Word. I have previously spoken about the process I use to create this kind of word art.  I found a tutorial on the web that explains how to use the text box feature.  I use all these methods for my word art.  Here's an image that shows the text boxes used to create the quote:

    I used four different boxes set to "No Fill" and "No Line" so that when they overlap they don't obscure the box next to it.  I simply play around with font type and size until I get a feeling that the quote looks like art.  I'm not super pleased with the "forget" box placement here- a little too high.  However, I didn't notice until I had the project together.  After everything is just right, I print out the quote onto white cardstock to make the frame.  Here's the other details on the project:


    What do you think?  Should I forget about myself and get back to work?  I'm going to take that to heart and try to set aside some crafting time this weekend.  Crafting can be the best kind of work, yes?

    I'm linking this project up over at the Shabby Tea Room's Week #212: Pretty in Pink challenge, Simon Says Stamp's Monday Challenge: Anything Goes, and the Inspiration Journal's monthly challenge: A Few of My Favorite Things.   These are some of my favorite places to go and see inspiring creations that should light my creative fire.  Come join me!