Background

Friday, August 26, 2011

Tink says Happy Birthday

Thought I should also share with you the Tinkerbell card I made for my niece, Mackenzie's third birthday.  This card went with the tutu I made and discussed in a previous post.  My daughter, Katie, has previously made a set of the Tinkerbell and Friends images from the Cricut cart.  I remembered that the tough part was the eyes and I can say that this time, I found the exact same result. 

 I started by cutting out each of the layers for the piece.  The black shadow image and the white blackout image are the basis for the construction of my Tinkerbell. 
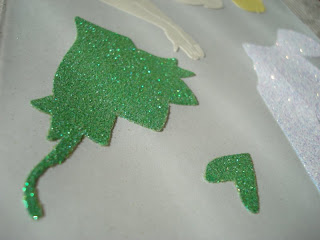
Her dress was cut out of green cardstock and I used my Xyron 510 to layer adhesive down to adhere green Recollections glitter and make the dress sparkly


Here's the final result:


I used a bit of white flocking to make Tinkerbell's puffball on her shoe.  This looks much more impressive in person.  Once more I lack the photo generation skills necessary to accurately represent the finished product.  The whole eyes and lips process on these layered images really identify my serious lack of artistic talent.  I managed to end at a result that wasn't entirely embarrassing.  Note to self, do some work on the web looking for hints on creating/drawing eyes, eyelashes and lips...  I'll get right on that!
 In the end, I decided to place Tinkerbell on a rocker base and adhere some magnets to the back.  This way Kenzie can remove Tink from the rocker and leave her on the refrigerator for however long she would like.

Nieces are nice to have and definitely bring out the creative in me.  Happy Birthday, Mackenzie.


Auntie Andie 

Wednesday, August 24, 2011

Make Your Own Tutu

My niece, Mackenzie, recently celebrated her third birthday.  Cute, adorable and ever so charming, I couldn't think of a gift more enjoyable to this girly girl than a tutu.  A few weeks ago, we "handed down" some of Katie's things to Kenzie which included a tutu my mother had made.  My thought was that Kenzie should have her own.  So I searched the net and found a very easy method for making a tutu at home.  The first instructions I found could not be improved upon and are located here.  She recommends using a lot more tulle than I ended up using, but I was also making this for a much smaller human.  If you search the web, there are plenty of adult women making tutus for themselves.  Maybe, if I was just a smidge younger I might try it....

Here's my final result:


                                                                              I selected tulle that had sparkles in both light pink and white.  I ended up cutting the strips approximately 2 inches wide and 14 inches long.  Folded in half to create the tie to the ribbon, the lengths are approximately 6 inches long.  The effect is quite lovely.

 
I ended up tying a knot at each side thinking that a three year old might work the tulle off the end of the ribbon just out of curiosity.  My desire is that Kenzie would be able to play with her tutu, wear it on random trips to the grocery store with mom or dad, or even on a trip to the park.  The process was so simple and quick to make, I would be a happy auntie to make six more over just the next year if she desires me to.  After all, what are aunties for?


Auntie Andie

Friday, August 19, 2011

Combining Uses- Making that card a couple different ways

I've mentioned several times that I try to be frugal in my card making and that I try to re-use ideas and supplies.  Here's a couple of ideas to utilize a great card layout in a couple of different ways.  This first card is a graduation card for my nephew, Patrick.  Patrick graduated from ASU with degree in Agri-business this May.  I needed a card fit for a male, not fancy and quick- work has been crazy and I didn't have but a few hours.  Out I pulled my Wild Card Cricut Cart and cut the the For the Graduate phrase out of brown cardstock.     
 The card design was very simple, matting with a bright blue/green cardstock on a brown cardstock card.  A one inch wide brown satin ribbon (off of a package I recently received) with a felt chevron fiber over the top finishes this simple look.  As I was thinking about the design of this card it strikes me that my neice, Kelly, was also graduating from Thunderbird High School within days of Patrick.  The challenge is to turn this simple, effective design into a more sophisticated, soft and girly look.  For the girly card, I decided to move more toward a black and white look. 
The challenge here is to off set the sentiment in a way that makes it visible on the patterned paper.  The Wild Card cart does not provide shadow or blackout for the phrase.  After cutting the sentiment out of black
cardstock, I glued it to a white cardstock making sure to choose a cardstock without texture.  Then I fussy cut the sentiment out.  My pictures don't exactly do the card justice, but I think matting the patterned cardstock on the pop of green metallic cardstock made for an elegant, yet not stuffy card.  The single piece of organza ribbon provides an shiny accent to draw the eye in.  Between both cards, I probably spent 1 1/2 to 2 hours sifting through my supplies, deciding on the design, and creating the two cards.  For me, that is a quick turn around and I can say I was pleased with the results.  I've got one additional example of this type of piggy backing on a design that I will share in the next couple of days.

Andie

Sunday, August 14, 2011

Happy Birthday Card

One of my recent favorites is Basic Grey's Sweet Threads line.  I used a couple of the prints in a birthday card for my friend, Keri.  Using a cut out from the Paper Lace Cricut cart, Lace 2- HpyBDy1, I  cut the sentiment from the orange printed paper from the collection, Weekend Look.  Using my trusty Crystal Accents, I created an acryllic look to the embellishment that helps to make it standout, creates dimension and I think enhances the color of this wonderful paper.  The buttons are Studio Calico's Wood Veneer buttons which have been misted with teal Glimmer Mist.  The wood veneer


looked smashing with the glimmer mist.  The color was vibrant and the glimmer added just the right eye-catching twist.  A piece of leftover orange fiber tied in the center of the wood veneer buttons and we're done.  Happy Birthday, Keri!  I sure enjoyed dinner at Casanova Brothers Pizza.  There really isn't much better than enjoying good food, a good friend's company and the time to just catch up on all the good stuff.  If you're ever in the vicinity of Gilbert, AZ, stop in and let Tony help you celebrate your Happy Birthday.  


Andie

Tuesday, August 9, 2011

Using a Card Design to Express Multiple Sentiments

In a recent post, I mentioned my use of the same design for multiple purposes.  Here again is another example.  Over a weekend I found myself needing to generate a sympathy card and a birthday card.  How to get that complete in a few short hours while still enjoying the process and being satisfied with the outcome?  The wildly diverse needs made it a unique challenge.  Nobody wants to get a somber birthday card and bright colors are not appropriate for times of expressing sympathy and sorrow.  Pictured here is the birthday card I designed using some scraps from an old 6 x 6 K & Company paper pad.

The paper strips are inked with a cranberry ink pigment ink pad.  The ribbon is a teal suede 1/2 in. ribbon.  The centerpiece is a Close to My Heart stamp set which includes the emblem, the outline of the emblem, and the sentiment.  The emblem was stamped using a yellow pigment ink and the sentiment and the emblem outline were stamped with the cranberry pigment ink.  The yellow embellishment is actually much nicer in person.  I used the Cricut French Manor cart to cut the embellishment out of cream cardstock.  Then, I sprayed the embellishment with gold Glimmer Mist to give it a sparkly finish.  I used a cream cardstock card and inked the outside edges with the yellow pigment ink.  Inside I printed an elegantly scripted "Happy Birthday".  The finished project looks very elegant and has much more depth in person.  So, how to change this into a sympathy card? 

I decided to keep the layout and embellisments the same.  The "In Sympathy" was printed on cream cardstock using MS Word.  All other finishing touches for the card  were exactly the same. 
I used a verse from Isaiah 26 to express my heartfelt sympathy.  Clinging to the Rock of our salvation is the hope by which we feel sorrow mingled with joy in times of loss.

You keep him in perfect peace
   whose mind is stayed on you,
   because he trusts in you.
Trust in the LORD forever,
   for the LORD GOD is an everlasting rock.

Thursday, August 4, 2011

Project Project Runway

One of my favorite blogs, http://www.notmartha.org/, recently discussed her association with an online sewing creativity project called Project Project Runway.  I thought the whole idea was so cute and inspiring, we've updated the blog with a button to click over to Just Crafty Enough.  You'll need to search their posts each week (Thursday is the day for the weekly big reveal!) for the Project Project Runway posts, but it seems worth the effort for now!  Look under the Challenges button or click the button to the right.  Have fun!  I intend to.


Andie