Background
Sunday, July 29, 2012
Wooden Decorated Anniversary Box
A few weeks ago a male co-worker approached me for help. This isn't exactly common, but also not unheard of. The uncommon part is that said co-worker was actually looking for crafty help. His request centered around a journal he had written to give to his wife on their 20th wedding anniversary. He was looking for a decorative container- a box of some sort- that his wife to store the journal. His request- keep it simple, use my creative juices and come up with something. Here's the finished result.
Looking (desperately) for inspiration, I asked my co-worker to see some wedding photos. The bridesmaid dresses were almost the exact pattern of my bridesmaid dresses only in a satiny teal rather than my seafoam green. This gave me confidence that if I made something I liked she might equally enjoy it. Firm boost in confidence! Her bouquet was made of calla lilies. This was a bit of a set back. I don't know the last time I had seen calla lilies in scrapbooking supplies, let alone paper or satin flowers. What to do? Search the internet of course! I happened across a website with instructions for making paper calla lilies from grunge paper over at Ink Stains. Roni graciously provided her pattern which I promptly printed in several different sizes. These lilies were made using a pattern that was approximately 2 inches in height. I modified mine a little to use a yellow pipe cleaner. The grunge paper became slightly stiff with the painting (I used Adriondack paint dabber). After panicking a bit (sometimes a required element for the perfectionist crafter within me), I just continued to work the painted grunge paper, softening the paper and shaping the final result to perfect finished result. I ended up gluing the flowers closed with Glossy Accents holding the flower closed for a short time as the glue dried. Finally, I wrapped the stems in brown floral tape. I liked brown here instead of the traditional green because it added just the right accent and didn't clash with my teal accent.
The wood box was unfinished that I found at Ms. I used stain and a varnish to finish the wood. Each of the shaped elements were made using combinations of Distress Inks (the teal being accomplished using the Spring set Peacock Feathers, with a little Faded Jeans and Broken China combined) and finishing the results using the Rusted Enamel technique from my Creative Chemistry 101 class. I decoupaged the elements onto the stained wood box, tied a white ribbon around my flowers and hot glued the flowers to the front. I think this really turned out great and the report is that his lovely bride thought so too. I hope it makes a smile on her face for years to come.
Andie
Friday, July 27, 2012
Isn't She Clever?
Since I can't say thank you for a thank you gift, I thought I would share her contagious craftiness with you. The wicker basket was adorable filled with sweet, delicious cherries. Now I have my mid-morning snack and a great feeling of being appreciated. Couldn't have been a better start to my Friday.
Andie
Wednesday, July 25, 2012
Christmas in July- A Peak
Danielle Flanders You Are My Sunshine Card |
Getting Christmas cards is one of the highlights of the year. Getting a homemade card is a real treat. There's still time- four or five months worth. Give it a go!
Andie
Monday, July 23, 2012
Magnet Boards
Brandy (through Andie)
Saturday, July 21, 2012
Which Austen Hero Are You?
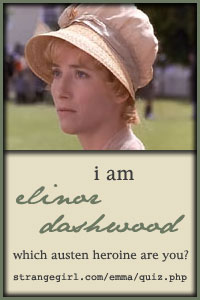
Trolling around the internet recently and I stumbled upon a fellow paper crafter who had posted this tag on her blog:
Oh, but I couldn't just leave that particularly interesting link alone. I clicked on over to the Emma Adaptations webpage to see what this was all about. Sure enough, they have developed a Jane Austen Character Quiz! What fun! Not that this is nearly as representative as learning your personality via some of the more popular test methods. But I surely enjoy imagining myself as a Austen heroine, especially after the fantastic movies that have been made from her novels. So, it is no surprise I qualify as an Elinor Dashwood. Elinor is often described as reserved and practical, one might even ascribe a certain judgmental overtone, but not in a negative way.... These are definately facets of my personality. Plus, I want to wear this to work one day in the near future:
Jane Austen Back Cover Art |
Jump on over and find out which hero you are. I'd love to hear in the comments, so feel free to come on back and share. It's fun!
Andie
Friday, July 20, 2012
Smash Book for Creative Chemistry 101
It has been a little while in the making and an even longer while in posting, but I finally finished my Smash book of ideas from the Creative Chemistry 101. Creative Chemistry 101 was on interactive online card class taught by Tim Holtz himself. You can still take the class as an independent class with full access to the class materials. Check them out at http://www.onlinecardclasses.com/timholtz/class-info/.
The class curriculum was simple, each day focused on a particular distress product. Key topics involved Distress Inks, using Distress Re-inkers, Distress Stains, the new (and fabulous) Distress Markers, etc. Each day there were assignments to create sample tags using the techniques taught with the goal of a group of tags that can act as inspiration and instruction long after the class is over. Although I didn't have much time to keep up during the course, I was ultimately able to complete each assignment. So when Brandy graciously gifted me with a (green) Smash book for collating crafting ideas, I thought I couldn't find a better use that to collate instructions for each technique, sample pictures from the class and ultimately my test tags that I created as a part of taking the class. This page is a typical treatment in the Smash book. I printed the sample tag that Tim created, the instructions provided in the class along with the supplies for that specific technique. On the opposing page, I typically created a pocket or some other type of fastener to house the sample tags I made (so that I can pull them out to either use or refer to in the future).
Some of the later tags I began mixing my techniques, so many of the tags are combinations and various trials I made. The original posts of tags made using the Stamping with Distress Stain were in this post here and again here.
The Smash book provides a patterned paper background for each page. I just happened to have some K & Co 4 x 6 paper packs laying around that coordinated nicely with the color scheme of my Smash book. These became very convienient and easy to make pockets. I simply cut the shaped paper in half and used glue dots to adhere the corners and bottom edge to the Smash book page. After that, it was easy to slide the tags right in. My Perfect Splatter technique tags were originally posted here.
Often, if there was a particular tag that I really like and inspires me, I would use a glue dot or two to place the tag on the page highlighting the result.
Tim was very open about the fact that he desired each of us to take what we learned from the class and spread our knowledge. I didn't take the time to duplicate every instruction- most of the techniques can be found in one manner or another through watching Tim's YouTube videos or simply visiting his blog and watching the videos he makes. The real magic of the class was the daily interaction that included answering questions and tailoring each class video to address the concerns he felt were important to understanding why some of these techniques work and why they might not work in certain situations. My Distress Stickles post can be found here and my Stamping with Markers technique and can be found in this post here.
I am sure you are wondering if I think the independent study of Creative Chemistry 101 would be worth it. I am going to give you all the facts that I myself might want to know in order to make the decision. For the $35 class fee you have lifetime access to ten full sets of videos created exclusively by Tim Holtz. Each set has one video from 5-15 minutes long with helpful information on the chemistry (or why) involved with the technique. This information is the information that is not always included in Tim's videos on his website. For a real "in-her-head" person like me, I find this information fascinating and helpful. I could see where a more artsy, follow-your-bliss kind of person might not find this information so very helpful (though if it makes you successful you might). Each set then also has a 10-20 minute instructional video of that days technique(s). Often these videos contain 2 or 3 different techniques and always contain Tim using the materials and explaining the steps in his normal incredible detail. These videos don't deviate a lot from those on Tim's website, but are maybe slightly longer and deep in depth. Finally, the class fees also give you access to view (only) the question and answer forum where Tim personally answered questions each day during the live class. Some of the more rich information can be found here as Tim helped those of us who participated live as we asked questions about why things did or didn't work right. The original live participants also uploaded to galleries which are accessible (again, view only) and a good source of inspiration.
It might be worth saying that no one has asked and/or paid me to make this post. I have said all this wholly within my own enthusiasm for how much I enjoyed the class. I know I would have a hard time justifying taking a static class. However, knowing what I know, I definitely would endorse this particular class even now without the interactive participation. I think you would find it well worth your money.
Andie
The class curriculum was simple, each day focused on a particular distress product. Key topics involved Distress Inks, using Distress Re-inkers, Distress Stains, the new (and fabulous) Distress Markers, etc. Each day there were assignments to create sample tags using the techniques taught with the goal of a group of tags that can act as inspiration and instruction long after the class is over. Although I didn't have much time to keep up during the course, I was ultimately able to complete each assignment. So when Brandy graciously gifted me with a (green) Smash book for collating crafting ideas, I thought I couldn't find a better use that to collate instructions for each technique, sample pictures from the class and ultimately my test tags that I created as a part of taking the class. This page is a typical treatment in the Smash book. I printed the sample tag that Tim created, the instructions provided in the class along with the supplies for that specific technique. On the opposing page, I typically created a pocket or some other type of fastener to house the sample tags I made (so that I can pull them out to either use or refer to in the future).
Stamping with Distress Stain |
Perfect Splatter |
The Smash book provides a patterned paper background for each page. I just happened to have some K & Co 4 x 6 paper packs laying around that coordinated nicely with the color scheme of my Smash book. These became very convienient and easy to make pockets. I simply cut the shaped paper in half and used glue dots to adhere the corners and bottom edge to the Smash book page. After that, it was easy to slide the tags right in. My Perfect Splatter technique tags were originally posted here.
Distress Stickles |
Stamping with Distress Markers |
I am sure you are wondering if I think the independent study of Creative Chemistry 101 would be worth it. I am going to give you all the facts that I myself might want to know in order to make the decision. For the $35 class fee you have lifetime access to ten full sets of videos created exclusively by Tim Holtz. Each set has one video from 5-15 minutes long with helpful information on the chemistry (or why) involved with the technique. This information is the information that is not always included in Tim's videos on his website. For a real "in-her-head" person like me, I find this information fascinating and helpful. I could see where a more artsy, follow-your-bliss kind of person might not find this information so very helpful (though if it makes you successful you might). Each set then also has a 10-20 minute instructional video of that days technique(s). Often these videos contain 2 or 3 different techniques and always contain Tim using the materials and explaining the steps in his normal incredible detail. These videos don't deviate a lot from those on Tim's website, but are maybe slightly longer and deep in depth. Finally, the class fees also give you access to view (only) the question and answer forum where Tim personally answered questions each day during the live class. Some of the more rich information can be found here as Tim helped those of us who participated live as we asked questions about why things did or didn't work right. The original live participants also uploaded to galleries which are accessible (again, view only) and a good source of inspiration.
It might be worth saying that no one has asked and/or paid me to make this post. I have said all this wholly within my own enthusiasm for how much I enjoyed the class. I know I would have a hard time justifying taking a static class. However, knowing what I know, I definitely would endorse this particular class even now without the interactive participation. I think you would find it well worth your money.
Andie
Monday, July 16, 2012
First Etsy Sale!
I want to thank everyone who stopped by my shop on Etsy- Contagiously Crafty. I thought I would report back on my marginal success. I guess I think even marginal success is worth celebrating! A potential customer privately sought me to see if I had a certain type of yarn. Well, it turns out I had a bit of selection and this resulted in my first sale. Yeah! I just thought I might publicly say, Thank You! to my kind customer with this simple tag!
I still have a goodly portion of yarns that I've not posted. Feel free to send me an email if there is something you are looking for. I'll be glad to look through the stash and make a great deal. The yarns have a great texture and would also be very useful in paper crafting techniques. I hoping to wind different textured fibers and post them for papercrafters everywhere. So much to do, so little time in the day!
Andie
Saturday, July 14, 2012
LSS Crop Night
Brandy and I had the recent good fortune of spending an entire Friday night at our LSS crop night. Happy cropping from 5:30 pm to around 11:00 pm. This is a rare treat for us. Working all day and then having the energy left to spend the evening out is not a regular occurrence. However, the hazy, lazy days of summer are working their magic (read: Use it or lose it vacation policies result in random days off).
This make-n-take was our free gift for coming to the crop. The design uses the fabulous Simple Stories Summer Fresh collection. You can check out the entire collection in a recent post on the Moxie Fab World blog. The chevron pattern is cut from a patterned paper , the quilted effect having been designed into the paper.
The embellishments were very small and simple, but add just the right accents. How cute is this? I consider this great customer oriented thoughtfulness while being very penny conscience. Brandy didn't really want or need a one page layout, she typically makes matching two page layouts. This card uses the make-n-take materials:
Kinda perfect don't you think? The card is made on a kraft paper base. I think she has enough supplies to make one more card, though not this exact design. Join me in encouraging her to make more, make more!
Brandy (through Andie)
Wednesday, July 11, 2012
Hooked on Hexagons Moxie Fab Challenge
Honeycomb and hexagons are all the rage. I've made a couple of different projects with my Basic Grey Sweet Threads collection recently. When the Moxie Fab World came up with a Hooked on Hexagon challenge, I just knew these cards were perfect. I had used a couple of cards in the July/August Paper Crafts magazine for inspiration and wouldn't you know they were featured in the blog post. The Sweet Threads collection has double sided patterned papers that coordinate nicely. I simply cut out hexagons using my Cricut Accent Essentials cart. Some of the cards have hexagons cut at 3/4 in. and some are at 1/2 in. The hexagons have each been edged with the Ink Blending Tool using Vintage Photo Distress Ink. The sentiment comes from an older Close to My Heart stamp set I've had for a while stamped with coffee Archival Ink. A small piece of baker's twine tied into a bow adds just a touch of girly to the card. This set was very fun to make and is an easy way to creatively use up those scraps. Now I'm off to enter this post in the challenge, want to join me?
Andie
Andie
Monday, July 9, 2012
Contagiously Crafty on Etsy
A good friend of mine lost her mother recently. I've previously blogged about Keri and her mom, Vi- making the sympathy card, remembering Vi at May Day, and often in my thoughts as I craft. Vi was a lifelong crafter. She had owned a craft shop when Keri was young and kept up with her skills over the years.
I even had the pleasure of listening one day as Vi explained her love of landscape weavings. She had just spent the day with one or two of the grandkids (Keri's children) making a landscape weaving. These beautiful works of art represent a somewhat obscure craft, that Vi turned into a passion.
Keri shared her concern with what to do with all of the various skeins, balls, and scraps of leftover yarn that Vi collected for use in the weavings. Being a good friend, I offered to take some of the burden off of Keri's hands. Thus began Contagiously Crafty on Etsy. Keri will work towards making her own postings of the finished landscapes, but in the meantime, I am trying to sell some of the yarn supplies. Here's a taste of the first offerings.
Each yarn stash consists of similar and like colored skeins, some of which are wrapped into balls using a yarn winder.
Other stashes have some skeins in their original windings with the original labeling.
If you see a stash you are interested in, click on the individual picture which will take you to my Etsy store front. This is not an auction sale. Each listing has a set price and shipping fee. If there is a particular color of yarn you might be looking for and/or a specialty type of yarn, do not hesitate to email me. You can find my contact information on the About page. Thanks for looking!
Andie
Sunday, July 8, 2012
More Melissa Frances Note Cards
Here's the final tally of Melissa Frances product inspired cards. You'll maybe remember this post regarding the card class that Brandy and I took at the Mesa, AZ CK Scrapbook Convention. All the embellishments on these cards sans the red flower were leftovers from the C'est La Vie Retro Stickers provided in the class kit. I picked up four different patterned papers at their booth during the shopping at the convention. Although I still have a few paper scraps, I have used 95% of the stickers and feel that I definitely got my money's worth. Check these cards out up close:
This Missing You card was made from patterned paper which already had this neat postmark. The ribbon was a spare piece from the card kit and the stamp shaped sentiment from the retro stickers set. All papers are edged in Vintage Photo Distress Ink.
This card contains a spare scrap of red rose patterned paper from a K & Co. paper scrap set I picked up at Ms for, I kid you not, 1 cent! I just knew that the paper scrap set was on clearance and didn't know that the cost was so low. I even remarked to the salesperson and she agreed that the price was right. Yeah me! All papers are edged in olive chalk ink.
These three cards just sort of made themselves. The pink patterned paper came from the stash, various pink scraps so small that I couldn't find a label to identify their maker. The I Love You card is made with Melissa Frances patterned paper and the Sassy card was made with more scraps from the K & Co papers. All papers are edged in Vintage Photo Distress Ink.
I don't have any specific plans for these notecards. Maybe they will end up in the mail or given as a set for a hostess gift. Either way, what a wonderful inspiration the leftovers proved to be.
Andie
Wednesday, July 4, 2012
Celebrating what is best about America
My grandfather, Robert Burrows, Sr.
My grandfather was part of the greatest generation who went over to Europe in World War II and fought for freedom. Today as I celebrate America's independence, I think of him. This photo was snapped when he spoke to a group of graduates at Chaparrel High School in Parker, Colorado last May. A local veteran's group organized an event where veterans come in and speak about their lives and their experience in the war. These are important things to pass on as the distance between our children and this major world event increases. It seems trite (but I don't think it is) to say that we should never forget what it costs to experience the great freedom we enjoy here in the United States.
I love you Grandpa!
Andie
Subscribe to:
Posts (Atom)